Easter Crafts for Kids
26 March 2013
No comments

What’s cuter than baby chicks and bunny ears? Your little one making Easter crafts! Mom Trusted rounded up a few simple Easter crafts for kids to try out this year:
Forever Easter eggs
This year, dye Easter eggs that won’t go bad. Take an uncooked egg and shake it hard for about a minute. Then have an adult use a thick needle or pin to poke a hole on each end of the egg. The grownup can then blow the contents of the egg into a bowl (Voila! Omelets for breakfast!). Dye the eggs as you normally would and after they dry, you have beautiful decorations that bring splashes of color to your home and don’t need to be refrigerated.
Fluffy bunnies
Make fluffy bunnies using construction paper and cotton balls. First, glue two to four cotton balls together to create the body. Then, glue one on top to be the head. Next, divide one cotton ball into fourths, gluing each part on to represent a foot. Take construction paper to cut out two small rabbit ears to glue onto the fluff balls. Finally, add a couple mini googly eyes.
Striped eggs
Spice up your regular egg dying by adding stripes to your family’s eggs! Help your kids separate the dye colors into three categories: light, medium and dark. Then, take a hardboiled egg and dip it in the lightest dye. Let it dry. Wrap a rubber band around the egg, spreading it out to create a crisscrossing design. Dip in the medium dye. Let it dry. Finally, add another one or two rubber bands and dunk the egg in the dark dye. You’ll have a batch of rainbow-striped eggs.
Eggshell flowerpots
Break off the top third of a dozen eggs and empty the yolks out. Discard the tops. Wash or thoroughly rinse out the bottom two-thirds of the eggshells. Fill with dirt and plant a few seeds in each. Place them back into an egg carton to help them stand upright. Then water and set them in a sunny spot.
Sources:
-“Eggshell Flowerpots” Martha Stewart
-“Kids’ Easter Crafts” Spoonful
-“Easter Activities for Children” DLTK
-Photo courtesy of Grant Cochrane/freedigitalphotos.net
Easy Crafts: Make an Educational Felt Board
01 March 2013
No comments
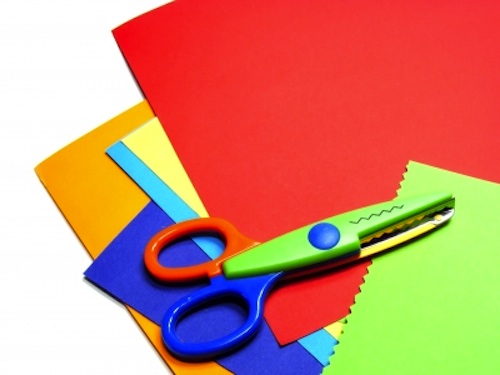
Looking for some easy crafts to keep you and your little one busy? Check out this felt board that’s both educational and fun. You can use it to teach colors, shapes, letters and more.
What you need:
-Different colored pieces of felt
-Large picture frame
-One plain piece of adhesive felt about one inch l inch larger than the frame
-Scissors
-2 pieces of cardboard board the ½ inch smaller than the frame
-Duct tape
-Kraft paper
Instructions:
1. Remove and discard of the glass from the frame.
2. Cut about 1 inch of the corners off of the large piece of adhesive felt.
3. Tape the felt around the cardboard.
4. Place the felt-covered board within the frame.
5. Add a second piece of cardboard to the back for extra support.
6. Secure with kraft paper and duct tape.
7. Cut fun shapes out of the different colored pieces of felt. Here are a few ideas:
-Letters
-Numbers
-Basic shapes
-Animals
Sources:
-“Felt Board for Kids.” Martha Stewart
-Photo courtesy of Grant Cochrane/freedigitalphotos.net
Homemade Valentines for Kids
12 February 2013
No comments

With Valentine’s Day just around the corner, it’s time to start crafting cards. Looking for cute ideas for homemade valentines? Look no further! MomTrusted found some of the most creative card crafts for little ones:
Tissue Paper Valentines
Load up on pink, red and white sheets of tissue paper, construction paper and some glue. Cut big hearts out of the construction paper and cut the tissue paper into small squares- anywhere from two to four-inch squares will work perfectly. Then scrunch up each square one by one, dip it in glue and stick it onto the construction paper heart.
*Tip: To avoid a gooey mess, soak a sponge in glue and set it in plastic Tupperware. That way, children just have to press paper on the sponge, instead of aiming the sticky stream of glue.
Lollipop Butterfly Valentines
Cut the four wings of a simply shaped butterfly out of pink, purple or red construction paper. Fold the butterfly in half and tape a sucker along the crease so that the round part pops out over the paper (this part will be the butterfly’s head). Then glue two googly eyes onto the butterfly’s head. Encourage your kids to decorate the wings and help them write Valentine’s Day messages.
*Tip: If you plan on letting your little one do the cutting, make a stencil for them to follow for difficult shapes like the butterfly wings.
Candy Pillow Valentines
Staple two paper hearts together and stuff the paper pillow with a handful of candy like sweethearts, Skittles or M&Ms. Before you stuff the hearts, have your little ones decorate the outside with paint, markers and even glitter. Just remember to let the art dry before you start stapling and stuffing them.
*Safety tip: Leave the stapling to the grownups.
Sources:
-“7 Super Creative Valentine Ideas for Kids.” Momtastic
-“Valentine’s Day Craft for Kids.” Social Moms
-“Printable Valentines.” Skip to my Lou
-Photo courtesy of luigi diamanti/freedigitalphotos.net

Latest Pins on Pinterest
-

A Guide to talking to your kids about pride and lgbtq+ rights
-

easy baked ravioli recipe everyone will love! Also easy to pack inside a school lunch. with gluten free option
-

-

-

-

-

A fun and delicious breakfasty twist on salad!
-

No sew face mask project
-

Make your favorite Mac & Cheese recipe (or the box kind works nicely for this and the kids love it anyway ;). At the same time, throw together your normal Chili recipe (here’s a super easy chili recipe if you don’t have your own).
-

Make your favorite Mac & Cheese recipe (or the box kind works nicely for this and the kids love it anyway ;). At the same time, throw together your normal Chili recipe (here’s a super easy chili recipe if you don’t have your own).
-

Since we live in the country that is open to the brunt of all the weather (wind, wind and more wind), it is super important to provide the best support to garden plants right from the beginning. There is no “one best way” to do this. I usually work with whatever I have on hand as you can see from some of the included photos.
