Educational Activities for Children with Down Syndrome
12 November 2013
No comments

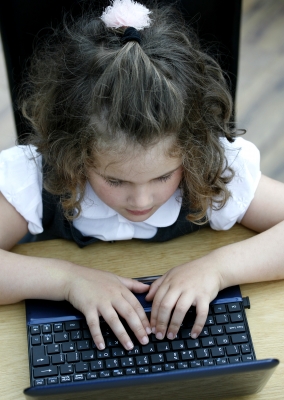
Children with Down syndrome develop at a slower rate than most children without Down syndrome. They face challenges, such as being slower to learn how to talk and care for themselves. This certainly doesn’t mean these things are impossible. They just take a bit longer and some extra dedication. Here are some fun, educational activities for children with Down syndrome that will help make learning fun and a little less frustrating for little ones.
Use visuals to learn sounds.
Often, visual learning works best for children with Down syndrome. Sometimes, sign language can help little ones communicate and learn verbal language. You can either learn actual sign language or invent your own. For example, maybe touching the mouth represents hunger.
Take turns.
Teaching a child with Down syndrome to take turns can amplify learning experiences. Communication relies heavily on taking turns, having a listener and a speaker, but sometimes this concept doesn’t come naturally. Demonstrating this turn taking and even verbally communicating “OK now it’s my turn” can help the learning process happen a bit faster.
Use repetition to your advantage.
Studies show that kids with Down syndrome usually need at least a 100-word vocabulary before they start transitioning from one-word statements to multi-word thoughts. Repetition can help accelerate learning to speak. Think of it as an add-on game. If the child says, “Car,” say, “Car. Fast car.”
Sources:
-“Down Syndrome” Kids Health: http://kidshealth.org/kid/health_problems/birth_defect/down_syndrome.html
-“12 Booster Activities for Kids with Down Syndrome” Parents.com: http://www.parents.com/health/down-syndrome/booster-activities-for-kids-with-down-syndrome/
-“Down Syndrome Learning Activities” Pinerest: http://www.pinterest.com/trudycallan/down-syndrome-learning-activities/
-“Top Five Instructional Strategies for Students with Down Syndrome” Special Ed Post: http://specialedpost.com/2013/01/31/top-five-instructional-strategies-for-students-with-down-syndrome/
-Photo courtesy of kdshutterman,/freedigitalphotos.net
Amber Alert Site Went Back Up After Taken Down During Government Shutdown
14 October 2013
No comments
The government shutdown closed plenty of questionably “non-essential” government programs. Among them, the federally funded preschool program Head Start. When funding didn’t come through as expected on October 1, many of the programs scattered in states across the country were forced to close their doors. Parents across the nation were appalled, but not as appalled as when they saw the Amber Alert site had been taken down as part of the shutdown.
Amber Alert deals with alerts about abducted children. Although the system itself was never put on pause, the website did go down for a few days. Workers at the Justice Department said the event was a misunderstanding, blown out of proportion by the media. Officials said that after the funding was halted with the shutdown, they were no longer able to afford to pay enough staff to monitor the site. They thought it safer to put up a firewall to prevent any security issues.
The Justice Department pointed out that the site is not one ever used by law enforcement officials to help locate missing children. The Amber Alert system was never stopped, cut or interrupted at all. The website is only informational, meant to inform citizens of the department’s role. The Amber Alert system itself is more made up of outreach methods, including highway signs and tweets.
Despite all of these points, the website was restored shortly after it went down. After a wave of bad press and outraged parents spoke out about its unavailability, the Justice Department decided to reinstate the Amber Alert website.
Sources:
-Amber Alert: http://www.amberalert.gov/
-“After bad press confusion, Justice Department restores federal Amber Alert website” CNN: http://thelead.blogs.cnn.com/2013/10/07/after-bad-press-and-confusion-justice-department-restores-federal-amber-alert-website/
-“Amber Alert website brought back online after outcry” Fox News: http://www.foxnews.com/politics/2013/10/07/amber-alert-website-brought-back-online-after-outcry/
-Photo courtesy of Clare Bloomfield/freedigitalphotos.net
Play Based Learning
13 September 2013
No comments

As teachers, care providers and parents, you know better than anyone that kids learn best through hands-on or play based learning. Our friends at Kodo Kids know that hands-on play is not only extremely educational, but also the most fun way to learn. That’s why they produce products that promote investigation and exploration.

As childhood expert Bev Bos would say, “If it’s not in the hand, it’s not in the head.” At Mom Trusted, we agree with Kodo Kids’ learning philosophy. Open-ended play is an important learning style for children of all ages. It helps create a deep understanding of the material introduced to them. This hands-on, play approach is especially important during early education, when children are just starting to discover and create their learning style, along with the world around them.

Products from Kodo Kids range anywhere from Digger Kits, designed to encourage outdoor play and learning by digging, burying and sifting through sand and soil, to Kodo Clay, an all-natural product meant for art and expression. There’s a magnetic filling kit that teaches kids about magnetism and iron particles. Kodo Kids even has Pump Works, a kit of water tubes that lets children test out their engineering and water pumping skills.

How do we know Kodo Kids’ products are great? They sent us some and we loved them! With a wide variety of tools, toys and gadgets, any teacher, child care provider, or parent is sure to find something right up their alley that suits their individual teaching or parenting style. Visit Kodo Kids’ products for yourself today to see just how great hands-on learning can be!
Free Preschool: Yes, It really exists!
29 August 2013
No comments

With the steep costs of preschool, many parents are searching for lower costing options or even eliminating pre-k altogether. Those in Los Angeles County may have a more affordable option at their fingertips. The Un Mundo de Amigos Preschool offers free and affordable preschool to kids in the LA county.
Un Mundo de Amigos offers free half-day preschool without any financial restrictions. The only requirements are that the families live in LA County and children fall within the birthday perimeters. Un Mundo de Amigos does, however, still offer affordable childcare to families of kids who are younger than four or those who’d like their kids to participate in the full-day program. Families who fall into those categories are welcome to opt for the program’s private pay option, which costs $5 per hour, still much lower than most other pre-k programs.
Laurie Peterson, who had previously worked in the business of PG golf tournaments, founded Un Mundo de Amigos after seeing the joy her own son got from starting school. “I realized that not every child had had the same beginnings as he has had,” said Peterson. “And yet every parent loves their child as much as I love him.”
Most of it is funded through the Los Angeles Universal Preschool, a non-profit dedicated to increasing preschool affordability and access in the LA area. In 1999, as a result of a 50-cent tax law on cigarettes and other tobacco products in California, more funding was put toward early childhood development. Eighty percent of the new revenue was distributed among counties in California and backs organizations such as LAUP, working to improve the lives and education of children from the age of birth to five years old.
The program has been going strong and just graduated its fifth preschool class. Un Mundo de Amigos enrolls about 130 students each year and this year is no different. With the school year officially beginning in September, Un Mundo de Amigos has a handful of spots available in its free program and only one private place still open.
For more information about Un Mundo de Amigos Preschool, click here.
Approved for All Ages: Childproofing Around Your Home
08 August 2013
No comments
Guest Post by: Angelo DiGangi of Home Depot

Have you ever heard a new mother joke that she would rather her baby not begin walking, because then she’ll have to chase him around? It’s true that carrying our children ensures that we know exactly where they are at all times, but even when a child begins to explore the world, there are ways to make that world safer.
Whether you are at home with small children of your own or you are looking for the best ways to childproof your childcare center or local business, there are ways you can organize and safeguard kitchen cabinets, drawers and other places where you might not want tiny hands.
Locks of Love
One of the most important ways to childproof your home is to keep kitchen and bathroom cabinets and drawers that contain harmful or dangerous items off limits.
First, get organized.
Don’t put things like poisonous cleaning products in the lower kitchen cabinets, if possible. Try storing plastic food containers, plastic dishes, dishtowels and other harmless items for areas within the reach of small hands.
Check out what’s available.
When it comes to latches and locks to keep your kitchen items safe, there are plenty of options. Hardware stores, specialty shops and super stores are all fine places to peruse options for safety latches. There are two main types of latches for cabinets and drawers.
- Magnetic locks – These often require a little more carpentry skill than some other choices. Once installed, only an adult with the proper “key” can unlock the cabinet.
- Hook Locks – These devices are simple to install. They consist of a bendable piece of plastic that hooks cabinet or drawers closed.
Elsewhere in the Kitchen
If you have harmful products stashed under a sink, those may be the first items you think about inside a kitchen – and with good reason! But there are other ways to keep your toddler safe in the most popular room of the house.
Use the back section of the stovetop.
If you’re boiling water or cooking, use the back burners. Keep the handles turned away from any side where your toddler might be able to reach.
Keep countertops clear.
Make sure appliances, knife sets and other kitchen gadgets are not at the edge of the counters, but pushed back and away from reach.
Elsewhere in the House
Latch your toilet seat.
More toddlers drown inside toilets than you could ever imagine. Keep your toilet seats closed and latched to prevent this.
Use an anti-scalding device for sinks and showers.
Don’t let your child turn on the hot water and burn himself. Install a device on the showerhead and faucet that prevents the water from becoming too hot. Most of these devices function by automatically reducing the water flow when it becomes a certain temperature.
You can also go a step further and install an anti-scalding device on your actual hot water heater. A professional plumber is usually the one to do this.
Cover outlets.
To avoid shock, cover all unused outlets with a safety cap.
Leave hairdryers and other bathroom appliances unplugged.
Even adults get burned sometimes – so remember to unplug any bathroom appliances and put them away after use.
Other Precautions for Safety
Use doorknob covers and baby gates.
If there are rooms in your house where you’d just rather not have children, try a simple doorknob cover or a baby gate to deter your toddler from entering.
Cover furniture edges with “bumpers.”
Children are prone to running around, falling and bumping their heads. You can prevent accidents involving the furniture by covering the corners with “bumpers” that soften the edges.
Avoid creating a “ladder” for windows.
Kids love to climb. That said, keep all furniture away from high windows, which can pose a falling hazard should your child climb onto the windowsill. Screens do not provide sufficient protection.
Keep cords out of reach.
Cords – whether from appliances or blinds – can strangle a child easily. Make sure your toddler cannot wrap him or herself in loose cords.
Keep bookcases and other structures sturdy.
Secure bookcases and any other furniture that could fall over onto a child by using brackets and anchors. Keep heavier items at the bottom to prevent a top-heavy structure.
Ensuring that your home is childproof is no easy task, but there are plenty of items to assist in your venture. And, other parents and visitors will feel at ease knowing that you’ve taken the time to create a safe environment for little people.
Angelo DiGangi is a Home Depot “on the floor” sales associate at a suburban Chicago store. His writing interests include providing kitchen design ideas for homeowners on the Home Depot website.
15 Ways to Prepare Your Child for Their First Day of School
07 August 2013
No comments
The first day of preschool is a scary one, both for you and your child. Here are some ideas for how to make that big step easier on both of you:
1. Pay a visit.
Visit the classroom with your little one to get them excited. This will not only create excitement, but help eliminate the first day nerves. Meeting his or her new teacher will also help by giving them a familiar face on the first real day of school.
2. Discuss the activities.
Tell your child what they’ll be doing every day. Think of it as explaining their schedule, even if they don’t have a firm grasp on time just yet. This way, when their teacher says, “OK. It’s snack time,” it will be an activity that your child remembers from their schedule. Schedules provide comfort and make the day flow more smoothly.
3. Pack their favorites.
A lunchbox filled with your child’s favorite snacks is a surefire way to chase some first day jitters away.
4. Leave a love note
First days are always a little scary so let your little one know you’re thinking of them. Leave a note in their lunchbox. Picture notes are great for those who aren’t reading quite yet.
5. Read books about preschool.
Reading stories out loud about how exciting preschool is will give your little one something to look forward to.
6. Buy the gear.
Go out together to shop for a new backpack, notebooks and crayons. New school supplies that he or she helped pick out will make them feel extra prepared and look forward to the big day.
7. Ask them.
Ask your child how they’re feeling. Are they excited? Are they nervous? Not only will talking through feelings prove therapeutic, but you may be able to put some of their worries to rest.
8. Set up play dates ahead of time.
If you receive a class list before preschool starts, give some of the parents a call. If your child has the opportunity to play with one or two of his or her new classmates before preschool even starts, she or he’ll be able to spot a familiar face on the first day.
9. Talk about the potty routine.
Many kids have just finished potty training when they start preschool. They may feel nervous about having to go while they’re in a new place. Talk about this before hand. Make sure they understand what steps to take. “Ask your teacher first.” “Don’t forget to wash your hands.”
10. Consider sending a comfort item.
If your child has a favorite blanket or stuffed animal, send it along with them. It will comfort them, especially during naptime when they’re trying to fall asleep in a new place. Just be sure to double check with the preschool to make sure it’s OK first.
11. Start bringing preschool up in day-to-day activities.
If your child draws a colorful picture, say “I bet you’re going to get to make other art projects like that at preschool.” If you see your little one share a toy, applaud them by saying, “Great job! Your new school friends are really going to love when you share with them.”
12. Share your own stories.
Reassure your little kiddo that when you started preschool, you were scared too, but then tell them about all of the fun you had and friends you made.
13. Goodbye routine.
Create your very own goodbye ritual. Maybe you sing a little song or give each other a hug and a kiss on each cheek. Maybe you recite a goofy poem. Routine makes kids feel safe so figure out your parting ritual and practice it before the big day. That way, when it comes time for the real deal, all the drills before hand will make using it for real, a treat.
14. Don’t linger.
If you look afraid, your child will pick up on it. And if you stick around too long when dropping them off, they’ll sense that something is wrong. You need to be as brave as you’re telling them to be. So put on a big smile and let your child know how excited you are for them to be taking the next big step!
15. Be on time.
Be on time when you pick up your child. Not only is it scary to watch all of the other classmates leave with their parents, while yours is nowhere to be found, but showing up late looks just plain irresponsible. So be there when you are supposed to be to pick up your child and hear all about their preschool adventures.
Sources:
-“10 Ways to Prepare Your Child for School.” Parents.com
-Fox, Isadora. “First Day Jitters: Getting Kids Excited About Preschool.” Parents.
-“Tips for the first day of preschool.” Babble.
-Photo courtesy of photostock/freedigitalphotos.net
How to Make Musical Instruments for Kids
24 July 2013
2 comments

Homemade musical instruments are fun to make and to play. Here’s how to make musical instruments for kids:
Homemade Guitars
You’ll need an empty tissue box, a few rubber bands, an empty paper towel roll and a pencil.
Step 1: Have a parent or teacher cut an oval hole in the center of the tissue box.
Step 2: Stretch four rubber bands across the box and the center of the hole.
Step 3:Slide a pencil under the rubber bands, near the top of the box.
Step 4:Tape or glue the paper towel tube to the end that doesn’t have the pencil. This is the guitar’s handle. Strum away!
Check out the Cereal Box Guitars we made here!
Homemade Rainsticks
To make your own homemade rainsticks, you’ll need an empty paper towel roll, dried beans, aluminum foil, a brown paper grocery bag and markers.
Step 1: Trace the circular end of your paper towel tube onto a brown paper bag. Then, trace a circle around the first, making it about two inches larger. Cut one-inch thick straps between the first and second line. Glue the flaps to the paper towel roll.
Step 2: Cut tinfoil six inches wide and 150% the length of the roll. Squish the foil into a long strip and then twist it into a spiraling spring.
Step 3: Place the foil coil into your tube and fill 1/10 of the tube with dried beans. If you don’t have beans, popcorn or dry rice will also work.
Step 4: Repeat step 1 on the open end of the tube.
Step 5: Decorate the tube with markers or paint and let the glue dry.
Homemade Drums
Make your own drums using a cardboard oatmeal container, a brown paper bag and your choice of decorative items, such as glitter, sequins and ribbons.
Step 1: Cut and glue the brown paper bag to fit the outside of the oatmeal container.
Step 2: Have the kids glue decorative items all over the drum.
Step 3: snap the lid on and you’re ready to play!

Latest Pins on Pinterest
-

A Guide to talking to your kids about pride and lgbtq+ rights
-

easy baked ravioli recipe everyone will love! Also easy to pack inside a school lunch. with gluten free option
-

-

-

-

-

A fun and delicious breakfasty twist on salad!
-

No sew face mask project
-

Make your favorite Mac & Cheese recipe (or the box kind works nicely for this and the kids love it anyway ;). At the same time, throw together your normal Chili recipe (here’s a super easy chili recipe if you don’t have your own).
-

Make your favorite Mac & Cheese recipe (or the box kind works nicely for this and the kids love it anyway ;). At the same time, throw together your normal Chili recipe (here’s a super easy chili recipe if you don’t have your own).
-

Since we live in the country that is open to the brunt of all the weather (wind, wind and more wind), it is super important to provide the best support to garden plants right from the beginning. There is no “one best way” to do this. I usually work with whatever I have on hand as you can see from some of the included photos.
